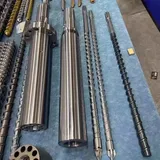
The barrel and screw melt the plastic and push it into the mold. The screw turns inside the heated barrel to melt each shot, then moves forward like a plunger to inject it through the nozzle. Together with the screw tip, the check ring, the barrel front flange and the nozzle, they form the plasticizing unit, the part of the injection unit that wears the most. The numbered drawing shows each part; this guide explains what each one does, how they wear and how to specify a replacement, and each part has its own guide, linked below.
How the barrel and screw work
Every cycle has two movements of the same screw:
- Plasticizing (screw recovery). The screw turns inside the heated barrel. Its flights carry pellets forward from the feed throat, and the shear heat of the turning screw, together with the heat from the heater bands, melts them. The melt collects in front of the screw tip and pushes the screw backward until the set shot size is reached. A small back pressure on the screw keeps the melt dense and well mixed.
- Injection and hold. The injection cylinder drives the screw forward like a plunger. The check ring closes, so the melt in front of the screw is pushed through the nozzle into the mold. The screw then holds pressure while the part cools and shrinks, and a little melt is left in front of the tip as the cushion.
Because the same screw both melts and injects, any wear between the screw and the barrel shows up directly in the shot: melt leaks backward instead of going into the mold.
The parts of the barrel and screw
Barrel
A thick steel tube with a precisely finished bore, heated in zones by heater bands, each zone measured by its own thermocouple. The bore is either nitrided or bimetallic (compared below). See the barrel guide. We supply complete bimetallic barrel and screw assemblies and screw barrel assemblies.
Screw
A general-purpose screw has three zones: deep flights in the feed zone take in the pellets, the flights get shallower through the compression zone to compress and melt the plastic, and the shallow metering zone delivers an even, fully melted shot to the front. Screws are described by their diameter and their L/D ratio and compression ratio; general-purpose injection screws typically have an L/D of about 20:1 to 25:1. Wear shows first on the outside diameter of the flights. The screw guide covers its parts and types; see also our injection screws.
Screw tip and check ring
The screw tip screws into the front of the screw and carries the non-return valve. The check ring slides forward to let melt pass while the screw turns, and is pushed back onto its seat ring to seal when the screw injects. A worn check ring is the most common reason for an unstable cushion, and it costs much less to replace than a screw. Removing the tip needs a screw head wrench that matches it.
Barrel front flange
Also called the barrel head, front head, end cap or cannon head. On most machines it is bolted to the front of the barrel; it closes the barrel, leads the melt into the nozzle and carries the nozzle thread. Its sealing face must be clean and flat: a damaged face leaks melt between the flange and the barrel. See the barrel front flange we supply.
Nozzle
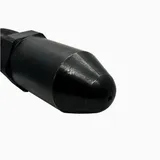
The nozzle screws into the front flange and touches the mold's sprue bushing on every shot. Its tip radius must be the same as or slightly smaller than the sprue bushing radius, and its orifice slightly smaller than the sprue opening, or the shot leaks and the sprue sticks. Open nozzles are the most common; shut-off nozzles are used for materials that drool and filter nozzles for material that may carry contamination. See injection nozzles and our article on nozzle drooling, stringing and blockages.
Heater bands and thermocouples
Heater bands, usually ceramic or mica, are clamped around the barrel and the nozzle in zones (rear, middle, front and nozzle), each zone with a thermocouple that feeds the temperature controller. A failed band or thermocouple leaves a zone too cold or too hot, which can give unmelted pellets or degraded plastic and puts extra load on the screw. See the heater bands and sensors guide.
Hopper and feed throat
Pellets fall from the hopper through the feed throat onto the screw. The throat is water-cooled so the pellets stay solid until the screw takes them in; if it runs too hot, the pellets soften and bridge, and the screw starves. A hopper magnet in the material path catches loose iron and steel before it can reach the screw.
Injection cylinder and screw drive
The injection cylinder moves the screw forward and holds pressure; see the injection cylinders we supply. On hydraulic machines a hydraulic plasticizing motor turns the screw, while electric machines use a servo motor (see the plasticizing motor guide). Worn cylinder seals cause slow or uneven injection: see our hydraulic cylinder seal kits.
Settings that load the screw and barrel
How the machine is set affects how fast the plasticizing unit wears:
- Back pressure and screw speed. Both add shear heat to the melt. They improve mixing, but very high settings lengthen recovery, raise the melt temperature and wear the screw, check ring and barrel faster.
- Shot size compared with barrel capacity. A shot that uses only a small part of the barrel capacity leaves the plastic in the barrel for many cycles, where it can degrade; a shot close to the full stroke leaves little cushion and less melting length.
- Screw design for the material. The screw's L/D ratio, compression ratio and surface should suit the plastic you run, especially heat-sensitive or filled materials.
Signs of a worn screw and barrel
- The cushion varies from shot to shot, or the screw creeps forward during hold.
- Screw recovery takes longer than it used to at the same settings.
- Short shots or weight variation that process changes do not cure.
- More black specks, burnt material or streaks, and slower color changes.
- Scratches or scoring on the screw flights when it is pulled.
Several of these also come from a worn check ring alone, a failing heater band or a pressure problem in the hydraulics, so measure before replacing. Our guide to measuring barrel and screw wear explains how, and when to replace the barrel covers the decision.
Nitrided or bimetallic?
A nitrided barrel has a thin hardened surface layer of the barrel steel itself and suits most unfilled plastics. A bimetallic barrel has a much thicker lining of wear-resistant alloy cast and bonded inside the bore, and lasts much longer with glass-filled, mineral-filled and flame-retardant plastics. Screws are matched in the same way, with nitrided flights for general use and hard-faced or coated flights for abrasive materials. The bimetallic barrel guide compares the two in detail.
What to send for a replacement quote
To quote a screw, barrel, check ring or nozzle, send:
- The machine brand and model, and the injection unit size if you know it.
- The screw diameter and the plastics you run (especially fillers such as glass fiber).
- Photos of the old part with the main dimensions: overall length, flight diameter, the drive end (spline or key) and the tip thread.
- The OEM part number or a drawing, if you have one.
Request a quote or send the details on WhatsApp.
Maintenance that makes them last
- Never turn the screw before the barrel has reached temperature and soaked: turning it on cold plastic can break the tip or twist the screw.
- Purge thoroughly before shutdown and when changing to a material that degrades easily.
- Keep the feed throat cooling water running, and clean the hopper magnet.
- Check the heater bands and thermocouples regularly; one cold zone puts extra load on the screw.
- Record recovery time and cushion: a slow change over weeks is the earliest sign of wear.
- When the screw has to come out, follow the steps in how to remove the screw, and inspect the tip set, front flange and nozzle while everything is apart.
Updated by the IMSPARES technical team.